This article is the third in a series we started last month covering how you can change the look of your Fiat 500X with a few simple Mopar accessories. This time we will show you how we installed a lower body side stripe. Body side stripes are a popular accessory and Mopar has a number of body stripe kits available. We chose a stripe that carries over the red accents our car has in its interior and matches the mirror covers and lower bodyside mouldings we installed previously.
The beauty of using Mopar accessories is their original manufacturer's fit and quality. Unlike many aftermarket parts, your Mopar accessory fits perfectly because it meets the same standards as the original parts used on your car. Mopar backs their products with a long, 2 year unlimited mileage warranty, plus if the product is installed at a dealer, the product is covered at any Fiat dealer in the country.* Hard to beat.
Installing a Fiat 500X Mopar Body Stripe
Fiat 500X Mopar Checkered Lower Body StripePart Number: 82214955, Suggested Retail: $165
The Mopar bodyside stripe arrived packaged nicely inside a heavy duty tube that was also in a box. The kit contains the graphics and instructions. Installing stripes is generally not difficult and just requires some patience and care. Traditional body stripes are installed on a wet surface so they can easily be repositioned and moved into the correct position. A squeegee is then used with firm pressure to lock the stripe into position and push out any air or water bubbles.
However, to my surprise the Mopar 500X stripes were designed to be applied dry.
The stripes from Mopar utilize the latest generation in stripe material, 3M Controltac, which is designed to be applied dry. I was a bit surprised and a little apprehensive about installing the stripe dry as I've only done wet installs on large stripes. I even contacted a professional striper to make arrangements for them to do the install.
It was an unnecessary concern because after research I found that 3M ControlTac pressure activated technology is manageable for a novice. This isn't the old fashioned pressure sensitive type of tape with an adhesive that adheres as soon as it touches a surface. Controltac is repositionable and adheres by applying pressure. Watch the following demonstration and you will see what I mean.
After watching the videos I decided to give it a try. While the install was not as easy as using the wet technique, I would say it is very doable for a do-it-yourselfer who has patience. If the procedure below is too much for you to tackle, hire a pro to do the install and they shouldn't charge much.
What You Need
With the install concern out of the way, I went about gathering the necessary supplies. I also recommend having a helper. While I did the install by myself, I did have a helper hold the stripe while cutting the backing paper. You can do it by yourself, but a helper comes in handy.
- Solvent Cleaner (Wax / Grease Remover, 3M General Adhesive Cleaner, etc.)
- Rubbing Alcohol (70% strength)
- Lint free cloths
- Claybar for cleaning paint - optional
- Squeegee - one used for applying tint preferred
- Masking tape
- X-acto knife with new blades
- Heat gun
- Infrared temperature reader - optional (inexpensive ones available at Harbour Freight)
- Waterbased, non-permanent marker
- Sewing needle
Work Area
Anytime you adhere something to your car, the temperature needs to be considered. Mopar requires the surface temperature be between 70° and 90°. Your work area should be free of dust and breeze. If needed, wetting the ground area will help keep the dust from floating up and contaminating the surface.
This video gives the basic idea of how we'll install our stripe.
Let's Start
Cleaning the surface is critical in assuring the decal doesn't peel off in the future. You cannot overdo this step, so make sure you clean very well. When you think it is clean, clean it again!
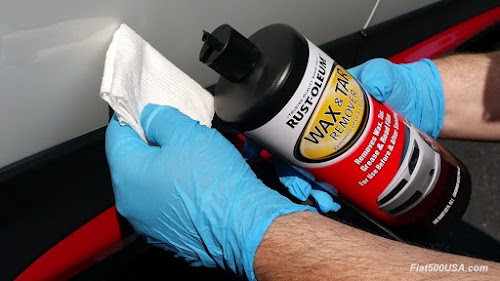
First up is wax remover. Follow the directions on whatever product you are using. I used a white, lint free paper towel to make sure there was no discoloration left when I finished this step.
Examining the surface, I found there was dirt embedded into the paint. I got out a Claybar and using the wax remover as a lube, went over the paint until the surface was totally clean. I then redid cleaning the surface with wax remover.
After the cleaning with the wax remover, next step was cleaning with rubbing alcohol.
make sure the surface is clean.
Applying The Stripe
As I did most of the application by myself, with a helper just taking pictures, I first started by taping the stripe into basic position.
I also taped the instructions up so I could easily refer to them.
Once the stripe was laid out on the body, I measured the location of where it should sit. You can use your non-permanent marker to mark the location. For my stripe, I found the bottom of the stripe paper laid across the top of the lower door panel mouldings was a perfect guide.
I then ran masking tape over the top of the stripe to keep it into place and to keep the stripe from stretching when being pulled on.
Once the stripe is perfectly lined up where it needs to go, Apply a piece of tape vertically to create a "hinge". This allows you to apply the stripe in two steps and makes it more manageable to deal with a long stripe.
Starting at one end, carefully peel the backing.
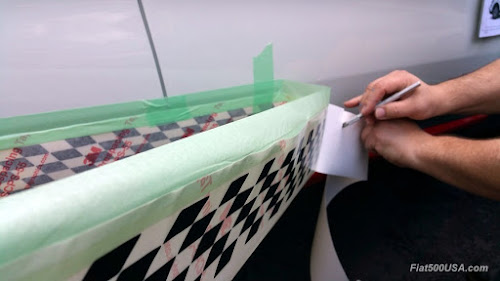
Here is where a helper comes in handy. Have them hold the stripe securely while you cut off the backing paper. The worse thing would be to have the sticky side of the stripe touch the ground picking up dirt. That would be a non-recoverable error.
Once the backing paper is removed, pull the stripe taught and lay it lightly against the car, lining up your reference marks. Don't worry, if you get it wrong, you can lift the stripe back up off the surface as long as you didn't press the stripe against the surface with any appreciable force. I used the masking tape on the top to secure the stripe to the body while I lined up the reference marks. Even still, the stripe is very sticky, and pressure will only make it stick even more. Once you are satisfied the stripe is where it needs to be, a tap with the finger is enough to tack the stripe down into location. Have a light touch and you will be fine.
When the first part of the strip is perfectly lined up, start on the other side of the "hinge" and remove the backing paper. Stretch the stripe out, line up the reference marks and tack the strip down the same as you did the front half.
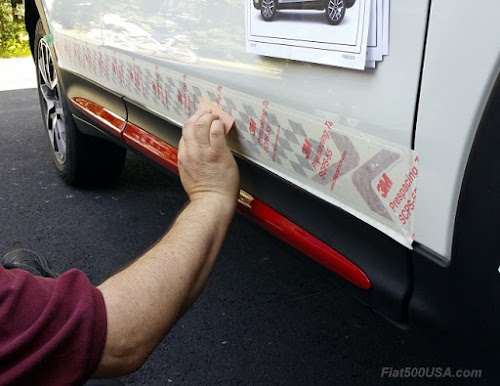
When you are happy with the position of the stripe, making sure there are no wrinkles or waves, use the squeegee to apply the stripe. I started along the top and systematically worked down, using firm pressure to push the air pockets out of the stripe. If there was a wrinkle, I lifted the stripe up, unsticking it from the surface, and redid using the squeegee.
I removed the masking tape and continued squeegeeing the stripe.
Go over every inch of the stripe to make sure there are no bubbles. These can be worked out by carefully pushing them out to either the top or bottom edge, depending on how close each one is to whichever edge.
Once the stripe is applied, you need to take the facing paper off.
Holding the backing paper back against itself slowly pull the paper straight back. Do not pull it away from the body or it can pull or loosen the stripe.
Keep inspecting the decal and if you see a bubble, stop and work it out with the squeegee.
When the backing paper is removed, carefully examine the stripe and continue working on any bubbles.
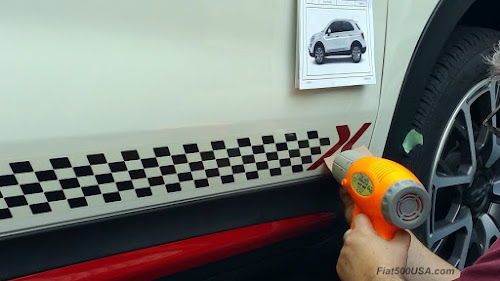
Use the heat gun to warm the decal up. Careful! The gun can overheat the stripe. Wave the gun back and forth to make sure you aren't using direct heat to one spot. The temperature shouldn't reach 125°. Use the infrared temperature reader if you need to.
Test the stripe to see if it is too hot with the back of your hand. The warm air will help the adhesive bond to the panel and will also help shrink bubbles. Carefully keep using the squeegee to work the bubbles. You can use a sewing needle to "pop" any bubbles that are too stubborn to remove.
Using a new sewing needle, carefully pierce one side of the bubble, while using your fingers to push the air out through the hole. Use the heat gun to go over the edges to make sure they are adhered well. Remember, holding the gun in one location can quickly overheat the decal!
You can give the stripe a day to adhere and then check again for bubbles. It helps if it is hot outside, but you can also use the heat gun and needle to carefully work on bubbles.
Take a new x-acto razor and holding the blade at an angle and along the door edge, pierce the decal skin and carefully cut the stripe. My left hand is resting on the front door and note the angle I am holding the x-acto knife. When the stripe is cut like that, the decal will slightly wrap around the edge of the front door, leaving a nice, cut line for the strip piece on the rear door.
Use a squeegee to ensure the stripe is adhered perfectly to the edges. If you ever have an issue with the stripe edge lifting a tiny dab of clear nail polish or paint can secure the edge.
That's it! Admire your new look!
==============
We hope you enjoyed this look at accessorizing your 500X. Mopar has over 100 neat items for your car, so take a moment and browse their site. Most accessories can be installed with some planning and patience so don't be afraid to give it a shot! Go to the Fiat 500X Do It Yourself forum to ask questions and discuss your ideas. We love to help and to see your car when you are done!
*Contact your dealer or check the Mopar website for warranty details.
Disclaimer: This is how I installed the stripe on my Fiat 500X and is provided for informational and entertainment purposes. If you have any doubts on you ability to perform this work or have any issues, I recommend having it done by a professional. I am not responsible for any issues arriving from you reading this post. Use at your own risk.
Thanks goes out to Mopar for supplying items in these articles.


Comments
Post a Comment
Comments are welcome, but do not forget to visit the Fiat 500 USA Forum for lively discussions on this post: www.fiat500usaforum.com