The Fiat 500 headlight uses a premium, high-performance 9012 HIR2 halogen bulb that puts out 87% more light than a common 9006 bulb.
This tutorial will show you how to change the headlight bulb in your Fiat 500 or Fiat 500 Abarth. It is a simple job that you can do yourself and will get you acquainted with one of the neat features of your Fiat 500. The headlights used on the NAFTA Fiat 500 are a marvel of engineering. They are a bi-halogen, projector beam design that allows a single bulb to function as both the low and high beam.
This is an image of the headlights used in a European Fiat 500. Note, while they look similar to the US model's, the high beam headlight is mounted separately and is below the main upper headlight. The Euro car's high beam is in the same location as the US 500's turn signal assembly. The reason is in the US, it is illegal to have headlamps in a staggered or offset position, so headlamps need to be lined up next to each other or stacked directly on top of each other. The upper light on the European 500 contains the H7 low beam headlight bulb and a turn signal bulb. The lamp below contains an H1 high beam bulb and a daytime running / parking light.
This is different than the headlights used in European and other markets which utilize separate low and high beam assemblies. The new design is space efficient plus eliminates separate high and low beam electrical circuits and the extra fuses, relays and wiring that would be required.
This is an original first generation 9012 HIR2 bulb with an infrared reflective coating. Newer bulbs look different and technology now eliminates the need to coat the bulbs with an HIR coating to achieve the same results.
They also allow the use of special high performance 9012 HIR2 headlight bulbs. The HIR designation stands for Halogen Infrared, a technology that enables the bulb to be much brighter than a similarly sized, conventional 9006 halogen bulb without having to increase the wattage. As the specification list for headlight bulbs below show, the 9012 headlight bulb used in the Fiat 500 is the brightest and longest lasting headlight bulb available for its size.
Compare the specifications for the 9012 headlight bulbs used in the North American Fiat 500:
- Fiat 500 9012 HIR2 bulb: 12.8V, 55W, 1875 lumens, 875 hour rated life
- Standard Philips 9006 bulb used in many cars: 12.8V, 55W, 1000 lumens, 320 hour rated life
- GE 9006 bulb: 12.8V, 55W, 1000 lumens, 850 hour rated life
- Sylvania 9006 Silverstar: 1000 lumens, 200 hour rated life
- Sylvania 9006 Silverstar Ultras: 1000 lumens, 200 hour rated
- Sylvania 9006 Xtravision: 1000 lumens, 850 hour rated life
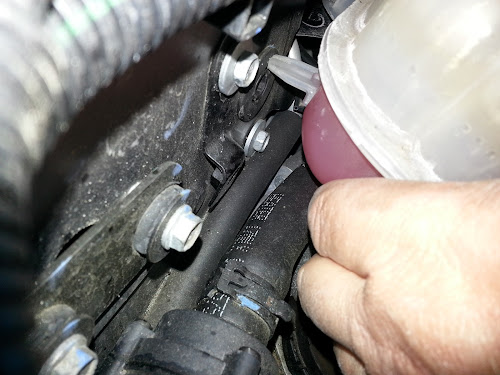
Changing the bulbs is relatively easy, especially on the drivers side. The passenger side has you unbolt the coolant expansion tank and swing it out of the way. That's not a big deal and reminds you that the car is a marvel of space utilization and automotive packaging. Depending on your car, you may be able to get your hand in there, but unbolting the reservoir is easy.
After you remove the bolts, there is a locating lug in the back of the coolant resevoir that needs to be wiggled out. You can then just push the reservoir out of the way.
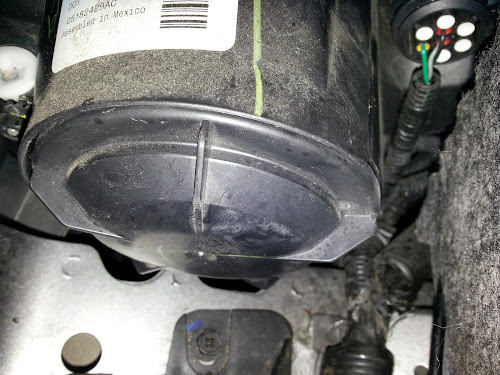
Headlamp cap used on the Fiat 500 and 500 Abarth.
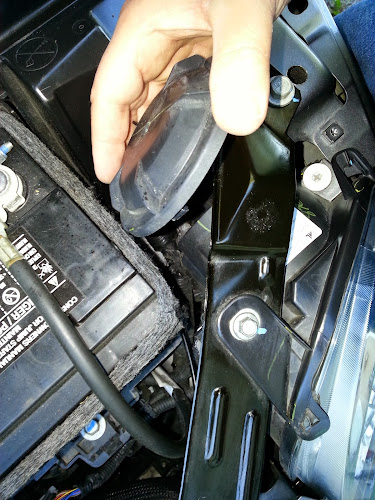
Locate the large cap on the back of the headlight. Give it a turn counterclockwise and pull the cap off. It is only about an 1/8 of a turn. Put that cap safely out of the way because it is easy to drop it into the depths of the engine compartment. The cap is not available separately, but if you need one it does fit other FCA cars and you may be able to get a used one on eBay or at a salvage yard. The part number on the back is 6002TR0013.
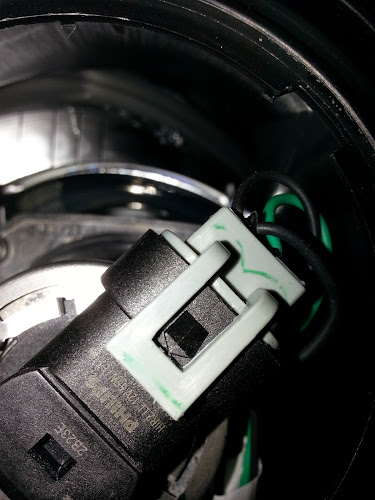
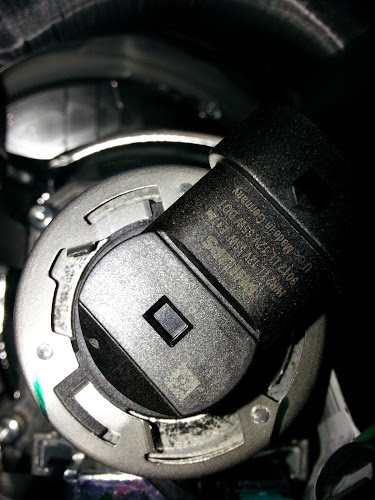
Note how the locking clip engages the locking tang. You need to lift the clip over the tang in order to pull the headlight connector off.
Locate the headlight connector and carefully put a finger under the locking clip and unhook it from its catch. Do not bend the clip too far or it will break.
Once the clip locking tang has been disconnected, wiggle the connector up and off the bulb. Make sure you just hold the connector and not pull on the wires. Using dielectric grease on the connector when reassembling will make changing the bulbs much easier in the future.
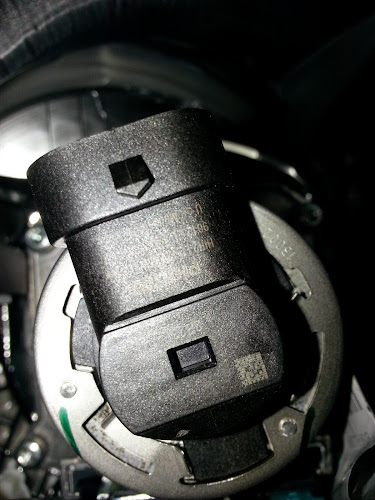
This is the headlight bulb's socket orientation when installed. The bulb is keyed to keep it locked in place.
You need to twist the bulb counterclockwise so you can then pull the bulb straight out. Compare this picture to the one above and notice how now the lower key tab is now lined up in the housing and can be pulled out. If you have difficulty turning the bulb, it can be easier if you push it in slightly while turning it. After you twist it until it stops, it should just come out without a problem, but if it is stuck, try to make sure you are pulling it straight out and you may need to wiggle it a little.
The bulb being removed.
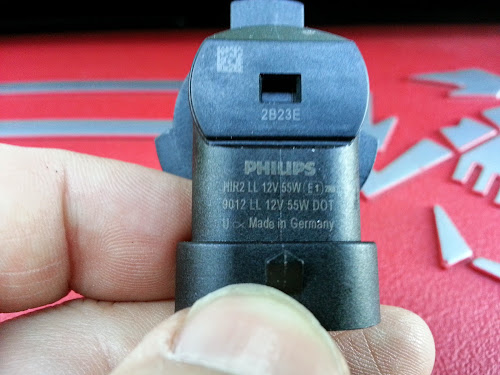
The replacement bulb should say 9012/HIR2 on it. A couple of notes. First, do not touch the bulb's glass! That can create a hotspot and cause the bulb to burn out prematurely, melt or even explode. If you do touch it, no worries, just get some alcohol and a lint free cloth and give it a wipe. Second, try not to bang the bulb around when you put the bulb back in.
When looking at the old bulb, make sure the rubber o'ring seal is still on the old bulb and did not get stuck in the headlight. Not the difference in the shape of this new generation 9012 HIR2 bulb and the original 9012 HIR2 posted above.
Using a little dielectric grease smeared into the connector would be a good idea, too. It protects the connector from corrosion and other issues arising from high resistance.
Reverse the procedure. Make sure the bulb is inserted all the way before giving it a twist to secure it. The bulb should be flush and not cock-eyed. Also make sure you push the connector all the way on and it locks onto the headlight bulb. Put your cap back on, install your coolant reservoir (if removed) and that's it!








Comments
Post a Comment
Comments are welcome, but do not forget to visit the Fiat 500 USA Forum for lively discussions on this post: www.fiat500usaforum.com